JetBrains' MPS Getting Started Part I
Table of Contents
This is part one of a Getting Started blog that will help you with basic information on the development of Domain Specific Languages with JetBrains' MPS application. It will contain a walkthrough to create a basic Domain Specific Language that will be able to store information about a Library, it’s items (books, movies, etc.) and clients.
Getting Started
You can download MPS' installer from the MPS website. Follow the steps in the installer and install MPS in a folder of your choosing.
Navigating through MPS is a lot like other modern IDEs. The first thing we see when we open the application is a small window that will contain buttons and tabs that allow for accessing projects, editing settings and adding plugins.
Let’s create a new project. Do that by clicking on New Project. Now a new window will appear that has more details. In this window we will select what the project will contain. We can choose either a Language Project, a Solution Project or an Empty project that will be extended later on. Select the Empty project, choose a location for it and call it "Library".
MPS layout
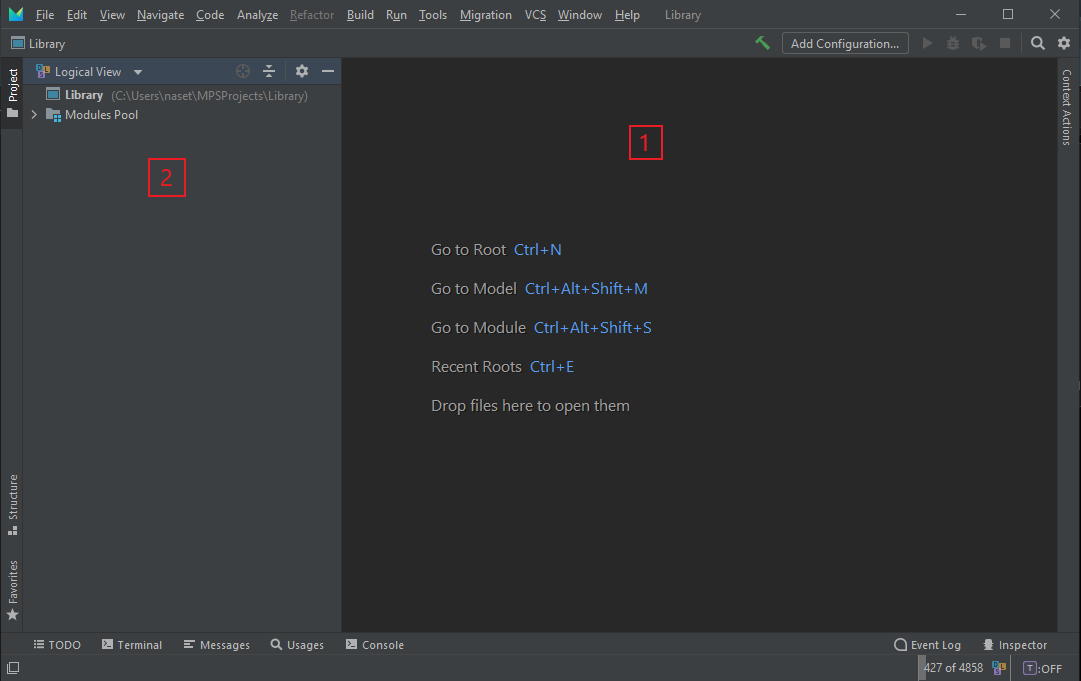
Now that we are inside the main MPS window we can see the main editor [1] in the middle and a number of sections and tabs.
Figure 1. Main MPS window
On the left side we can see the Logical View [2], which will help us navigate through the project. We can see how this translates to a file system by clicking on it and selecting Project Files.
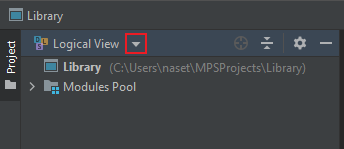
Figure 2. Logical view
Currently it’s a bit empty but we will get to that in a minute. The other important window that we are going to use a lot in the future is the Inspector, which can be opened from the bottom-right tab button. It is important because it shows additional information of the selected node in the main editor.
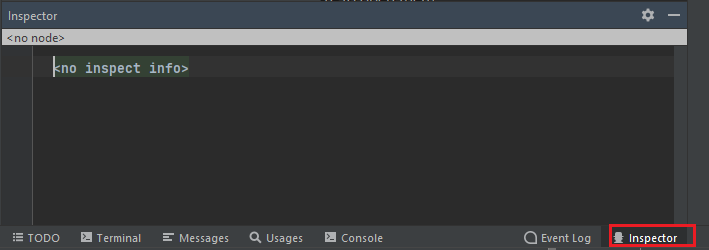
Figure 3. Inspector window
Creating the Library Language
We will be creating a simple Library that can store data about books, movies, video games and music that can be lended. We will also store some information about our clients so we can track where our items are.
In the Logical view right-click on the Library [1] and create a new Language called LibraryLang. This will generate a structure for the Language that we can see in the view.
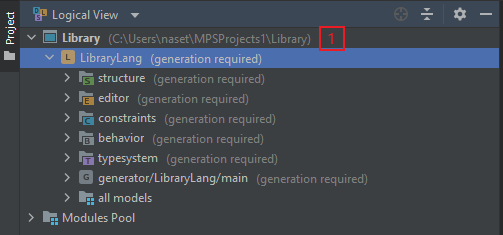
Figure 4. Language structure
Structure
To start the stucture of our language we must extract the most basic connecting concept of our subjects. We will have all items share a single parent concept which they will inherit from. Concepts work like classes with some extra steps which means we can use object-oriented ideas like abstraction and inheritance. They define the structure of the language. That structure will be accessed via nodes later by the user. Nodes are the objects that are created from the concepts and will be the representation of our Abstract Syntax Tree(AST).
Right-click on the structure folder in the logical view and create a new concept. We can now see in the main editor the structure of our concept.
Let’s define our concept now. This is going to be the parent of all other concept so let’s call it AItem (A for Abstract). We will have this concept implement the INamedConcept, which adds a name property. Create another property author as string. Finally make the concept abstract by putting the abstract keyword before the concept name.
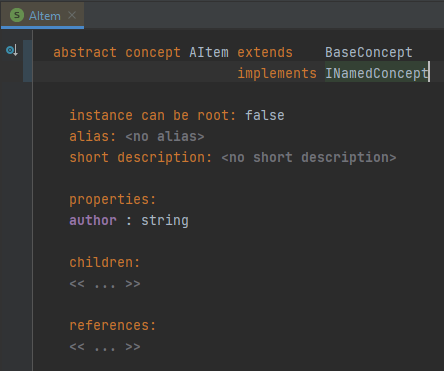
Figure 5. Concept Editor
What we see in the image above is all based on nodes. Since MPS is built from MPS with Model Driven aspects a lot of times it defines itself. That means that the structure of the concepts we create is another concept and we edit nodes in it. Almost everything we edit in MPS is a node.
Projectional editor
MPS works with a projectional editor. That means that what we see is different than what it is underneath but only to make it easier to read. If we needed to we can access the underlying JSON-like structure by right clicking on the node that you wish to view and clicking Show Reflective Editor for the Subtree or Show Reflective Editor for the entire page. This is very important because when we work with this application we have to know that we are not editing basic text. We have an underlying structure that we can use for our advantage. When the cursor is in the main editor we can use ctrl+←/→ to navigate or ctrl+↑/↓ to select various levels of the node. You can try that yourself both with the regular and the reflective editor so you get an understanding of it.
| When writing inside JetBrains applications we have a very helpful tool called Code Completion. This tool checks in real-time the context of the cursor and gives the user all possible inputs. The tool can be called with ctrl+space. The combination can be pressed a second time which gives input that is not based on what is already written. This combined with the previously mentioned ctrl+←/→/↑/↓ action allows for a lot of speed and versatility when editing something. |
Now that we have our foundation concept we can create the concepts of our actual items. Create a BookItem and a MovieItem concept and have them extend the AItem concept. Just so we can differentiate between the two items add some properties to each of them. For example - year of release for the book item and a genre for the movie item.
We now have enough concepts for our items. Next up need a concept that stores these items and allows our users to interact with them. Create a new concept called LibraryContainer. Have it implement the INamedConcept, set the Instance can be root node to true and add a child node of the type AItem with a 0 to many cardinality like this.
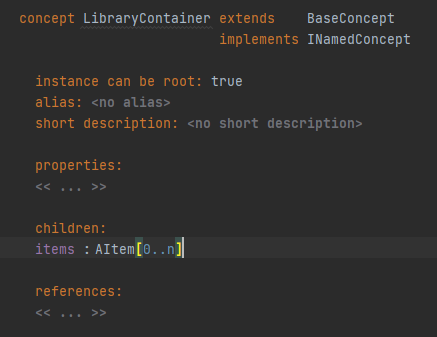
Figure 6. Library Container
Editor
The next thing we have to do is to define editors. This editor defines how the user sees our nodes. In the BookItem concept we can add new language aspects regarding this concept with the plus at the bottom left of the editor.
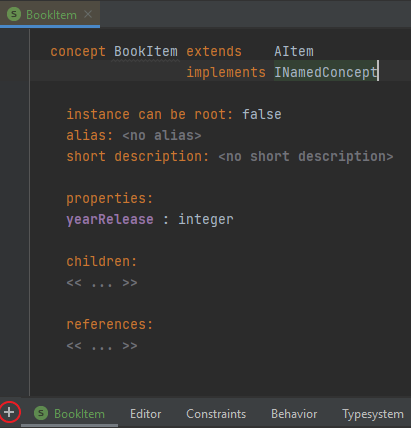
Figure 7. Add item
Add a new Concept Editor. This will create a new editor for the BookItem concept. In this editor we will define how the user can edit an BookItem node. As we can see the node cell layout is empty and the program doesn’t like that. When working with editors we have to contain our structure in collections. They can be either horizontal [><], vertical [//] or indent [--]. Let’s create a horizontal collection. Click on the red cell and click on the [ button, this will open the Code Completion window and we can select the collection (horizontal) option.
Now we have to have text areas so our user can add the name of the item, it’s author and the year of release. We can do this by creating property reference cells. We jump on to new nodes by either clicking on them or by pressing ⏎ . Use the Code Completion tool and add everything so it looks like this.
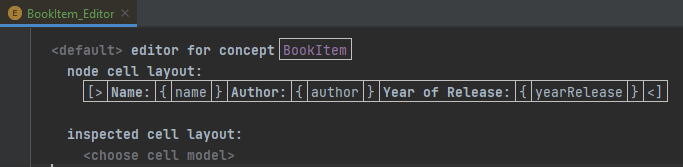
Figure 8. Final editor
What we have in the above image is a number of nodes. First we have the start horizontal collection node referenced with [>, after that we have a text constant that will show the user what property he will be entering Name:. Then we have the property cell {name}, we repeat the same thing for the other property, year of release and finally we have a closing horizontal collection node <].
We also need to have an editor for the library container. Add a new concept editor and use what you have learned to create an editor that allows the user to edit the name of the LibraryContainer and it’s children.
This time we edit both properties and children of a node. The properies are referenced with curly brackets {}, the children with %% and the one we haven’t tried yet - the references, with %%→.
|
| You can also add text constants that help the user with the editor. |
My editor looks like this:
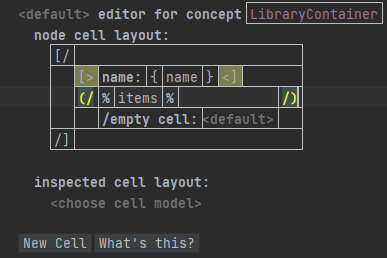
Figure 9. Library Container
In the above image we can see that I have defined a vertical collection and in it another horizontal collection that contains the nodes for the name property. This is because vertical collection split every node into a new line and we want to have these nodes together. We can define nested collections of any type. After that we see the items node which is a bit different than the others but the main idea is the same. We can define an empty cell: node which can be used to have a text constant as a helper.
User Interface
Now we are going to view what we have done so far. Right-click on the LibraryLang Language and Rebuild Language 'LibraryLang'.
| Rebuilding can also be done by clicking Ctrl+⇧+F9. |
Then right-click on the Library project, create a new Solution and call it sandbox. Then create a new model inside the solution. In the Model properties window and the Library language as a used language and click [Ok]. Now right-click on the model and add a Library container to it.
Inside this file we can add new items and edit their properties based on their editors.
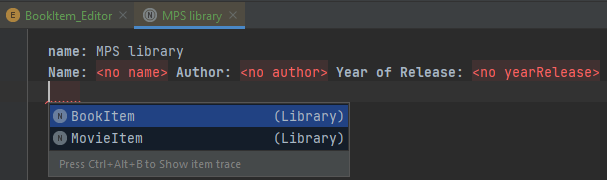
Figure 10. Library editor
Constraints
Constraints allow the developers to set additional rules that the nodes have to follow. Let’s add a constraint to the BookItem’s Year of Release so users cannot add books that are released in the future from today’s date. We will work a bit with java here. Create a new Concept Constraints for the BookItem concept. In it we can see a lot of can be properties that can be given boolean values from in-line methods. You can add them by pressing ⏎ on the <none> nodes.
We will focus on the property constraints now. Add a new property constraint for the yearRelease property. In it we will write a method that checks the date. We will use the Java date class. press Ctrl+R write "Date" and select the (JDK/Java.util@java_stub). Retrieve the year in an integer variable and compare it to the yearRelease property.
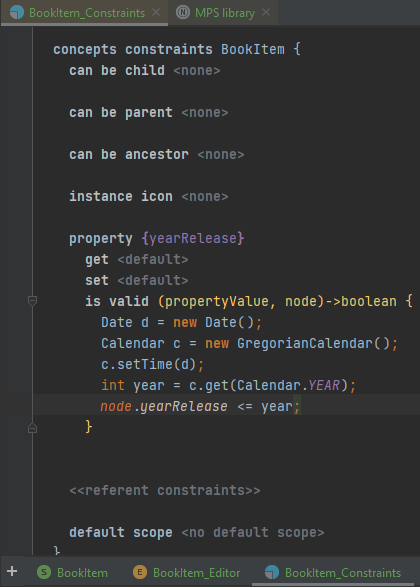
Figure 11. Book Item Constraint
We don’t need to add a return statement because JetBrains' base language automatically does it to the last statement of the block.
|
Now we can rebuild (Ctrl+⇧+F9) and check if the constraint works inside the sandbox editor.
| It’s good to practice so if you want to you can add the Music Album and Video Game concepts, their editors and some basic constraints. |